.png)
Sourdough Baking Tools That Make Every Bake Better
- Ginger Borden

- Apr 13
- 7 min read
This post contains affiliate links. I may earn a small commission at no extra cost to you.

If you are just getting started with sourdough or have been baking for a while, the right sourdough baking tools make a real difference. Not just in how your bake turns out, but in how much you enjoy the process. I learned this through trial and error with tools that frustrated me before I found the ones that actually work.
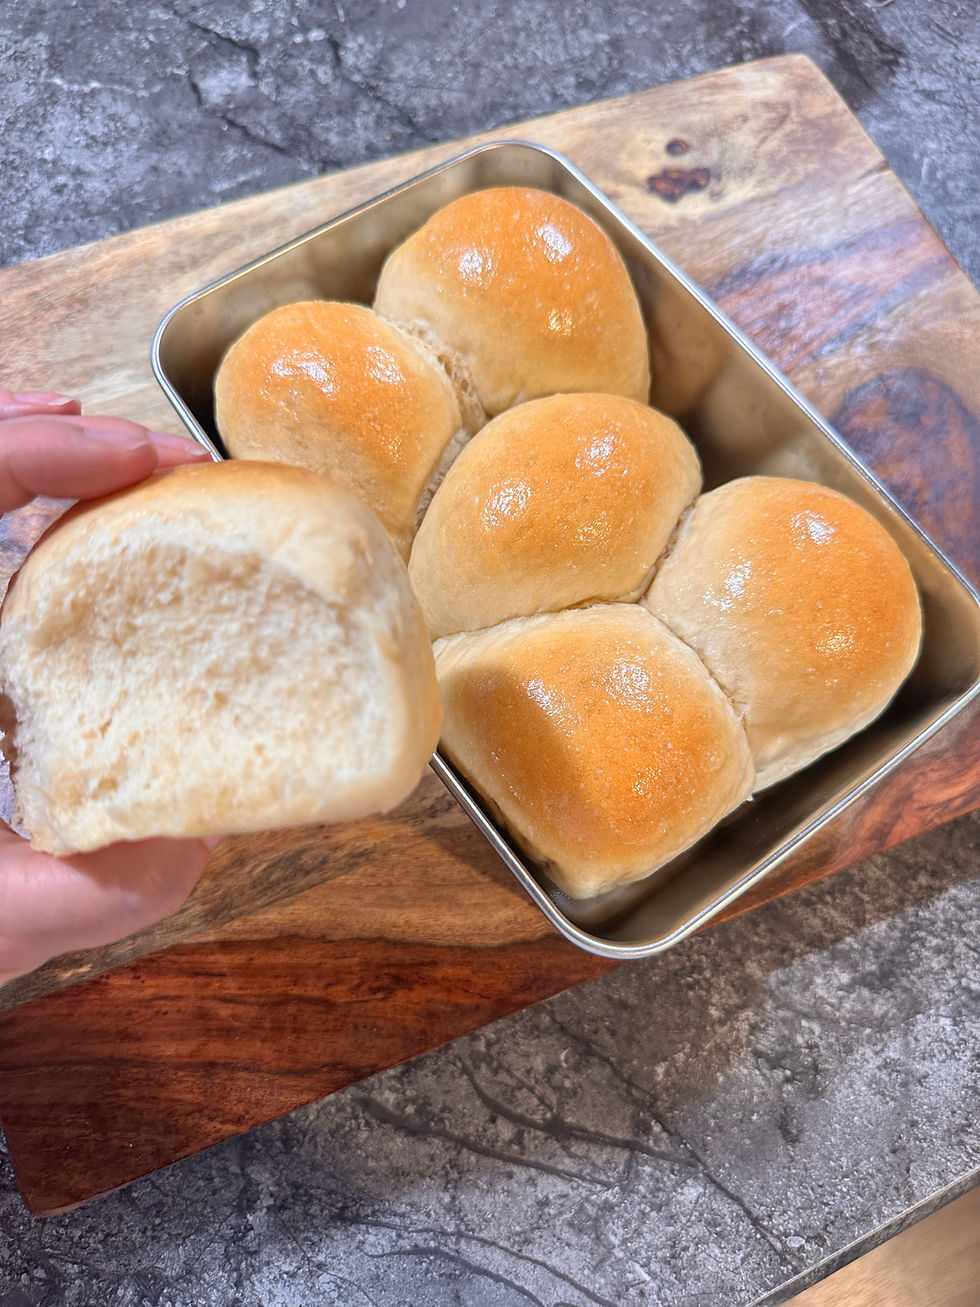
Everything in this post is what I used to make my Sourdough Hawaiian Rolls. These are the tools that earn a spot on my counter every single time I bake.
Why the Right Sourdough Baking Tools Change Everything
When I first started baking sourdough, I grabbed whatever I had in the kitchen. A glass measuring cup instead of a scale. My hands instead of a mixer. It worked, but barely. The more I baked, the more I realized certain tools were not optional. They were the reason my bakes were inconsistent.
This is not a post about buying everything at once. It is a post about understanding why each tool matters, so when you add something to your kitchen, you know exactly what problem it is solving. A lot of people will tell you what to buy. I want to tell you why.
The Kitchen Scale

A kitchen scale is the single most important tool you will add to your sourdough kitchen. Sourdough recipes use weight rather than volume because flour measured in cups varies every time depending on how you scoop it. Grams do not lie.
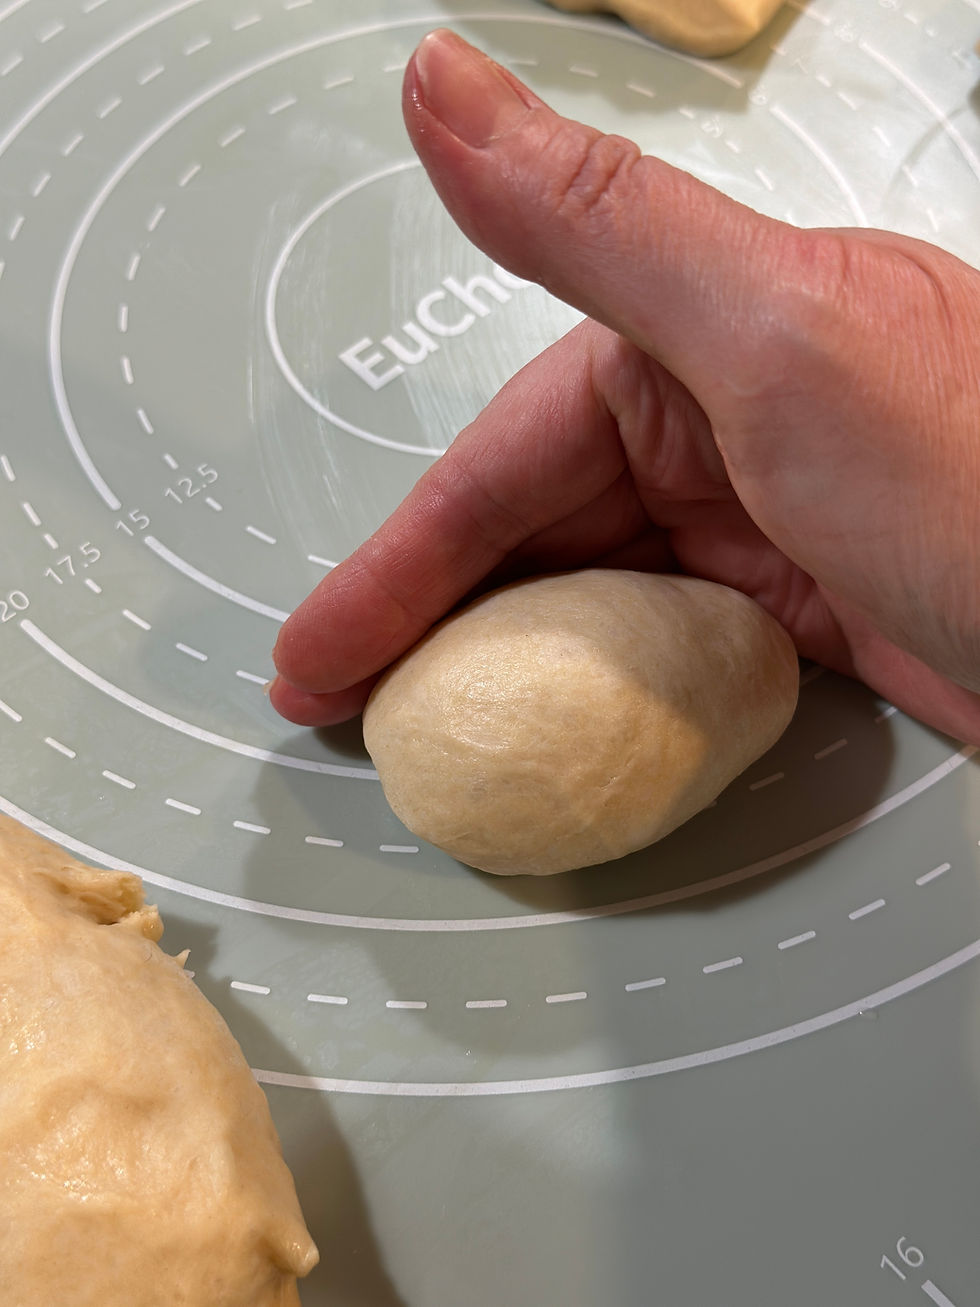
For my Hawaiian Rolls, I use the scale twice. Once to weigh 540g of flour and once to portion each dough ball to exactly 70g before shaping. That second use is what most people do not think about. When your rolls are all the same weight, they bake evenly and look consistent in the pan.

I use this kitchen scale and it has never let me down.
The KitchenAid Stand Mixer

For enriched doughs like Hawaiian Rolls, a stand mixer is not a luxury. It is the tool that makes the dough manageable. Enriched doughs contain butter, eggs and sugar, which makes them stickier and heavier than a lean sourdough. Trying to knead that by hand for the time it needs is exhausting and inconsistent.
The KitchenAid dough hook does the work for you, and here is something I did not expect: the bowl and the dough hook are surprisingly easy to clean. It is almost like KitchenAid knew people would be using it for sticky, enriched messes. A quick rinse and a wash and you are done. Fewer dishes is always the goal in my kitchen.
The Dark Glass Olive Oil Dispenser

After mixing your dough, you transfer it to a lightly oiled bowl for the first rise. The why behind this step matters. When you are working with a dough that is already on the stickier side, oiling the bowl keeps you from losing more dough to the sides. Every gram of that dough is dough you worked to mix. You do not want it stuck to the bowl.

The dispenser I use is dark glass, and that is not an accident. Light breaks down olive oil through a process called photooxidation, which destroys the flavor, the aroma and the nutritional value over time. Dark glass blocks UV rays and keeps the oil fresher longer. It is one of those small details that adds up.
You can find the one I use here.
The Silicone Baking Mat

This is my favorite find in the whole list. I love this mat.
Before I had it, I would wipe my counter and then worry about whether I rinsed it well enough to remove any cleaner residue before pressing dough against it. I am a clean person. I wipe my counters multiple times a day. But there is a difference between clean enough for everyday life and clean enough to work dough on directly. This mat removes that concern entirely.
The mat I use is not the largest size available and that turns out to be perfect. It fits my counter well, gives me plenty of room to work and stores flat in a drawer. Cleaning it is a little Dawn and a quick wipe in the sink. I shake off the extra water, hang it on a magnetic hook on my refrigerator for a few hours and then roll it back up. Done.
It also gives me a surface I trust completely, which means I focus on the dough instead of my counter.
Find the mat here.
The Bench Scraper

I will be honest with you. I did not like this bench scraper when I first got it. The wood handle felt rough and almost unfinished, and I nearly wrote it off.
But I kept using it. And something shifted. The more I used it and washed it, the smoother the handle became. It started to feel broken in, the way good tools do when they have been used so much they seem to fit the job. There is a reason your grandparents held onto certain tools for decades. Good tools get better with use. This scraper is proof of that. It is now my favorite one I own.
It is also one of the easiest tools in my kitchen to clean. Dough scrapes right off and a quick wash takes care of the rest.
You can find it as part of my Sourdough Starter Kit or grab just the bench scraper on its own.
Bowl Covers for the First and Second Rise

Covering your dough during the rise matters more than most people realize. When dough is exposed to air, the surface begins to dry out and forms a skin. That skin restricts how the dough rises and affects the final texture. You want the tops of your dough to stay moist and flexible throughout the entire rise.
For the first rise, I place a plastic bowl cover directly over the mixing bowl first to seal in the moisture, then layer one of these cloth bowl covers on top. The plastic does the sealing work. The cloth cover adds an extra layer of insulation to keep the warmth in while the dough rises.
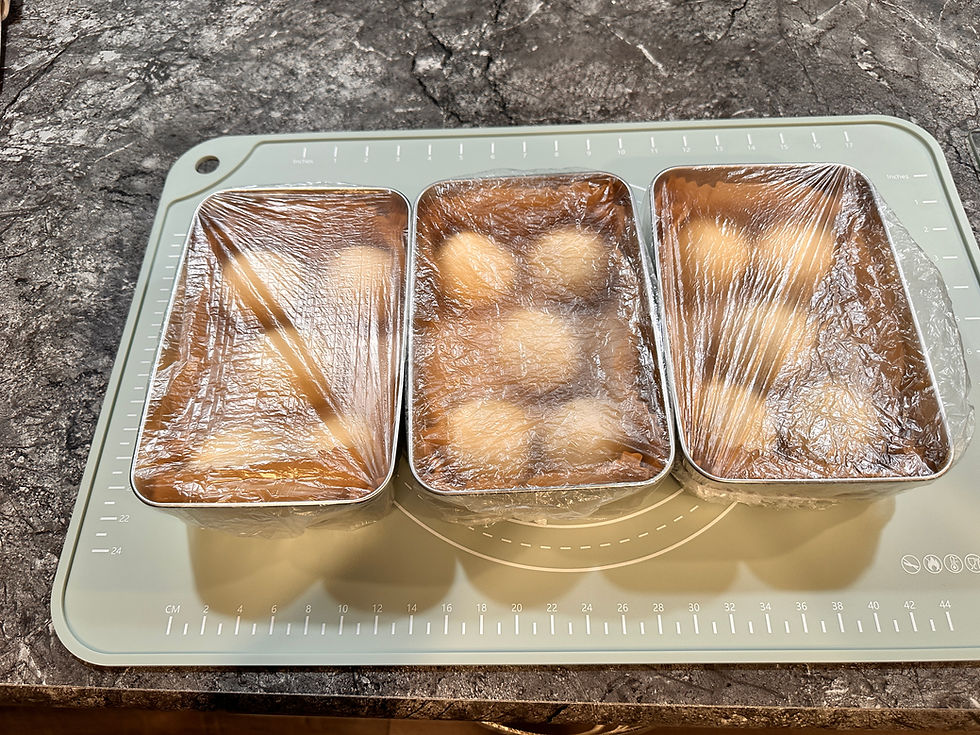
For the second rise in the loaf pans, I use one plastic bowl cover over each of the three pans, then lay a kitchen towel across all three.
Here is the why behind the towel: sourdough is a live culture and wild yeast is temperature-sensitive. The plastic bowl covers handle moisture, keeping the tops from drying out and forming a skin. The towel holds the warmth already around the dough so the temperature stays stable rather than dropping with the cooler kitchen air. You are not generating heat. You are preserving it. The more consistent the warmth, the more predictable and even your rise will be.
Parchment Paper

Parchment paper solves two problems at once. Cleanup and soggy bottoms.
When I used to butter my pans directly, the moisture from the butter combined with the heat created soft, steamy bottoms that never gave me the firm, structured base I wanted. Switching to parchment fixed it immediately. The paper creates a barrier that lets the bottom of the roll cook properly without sitting in pooled butter, and it keeps the sides from sticking.
Cleanup is almost nothing. You lift the parchment out, toss it and wipe the pan.
Find the parchment I use here.
The Loaf Pans

This one I learned through frustration. I used to bake my Hawaiian Rolls in a thick glass Pyrex pan. The tops would overbrown while the bottoms stayed pale and soft. I adjusted the temperature. I adjusted the time. Nothing fixed it consistently.
The problem was the pan itself. Thick glass is an insulator. It takes longer to heat up and does not transfer heat to the bottom of the dough the way metal does. When I switched to these thinner aluminum loaf pans, the bottoms browned at the same rate as the tops. Consistent color all the way around.
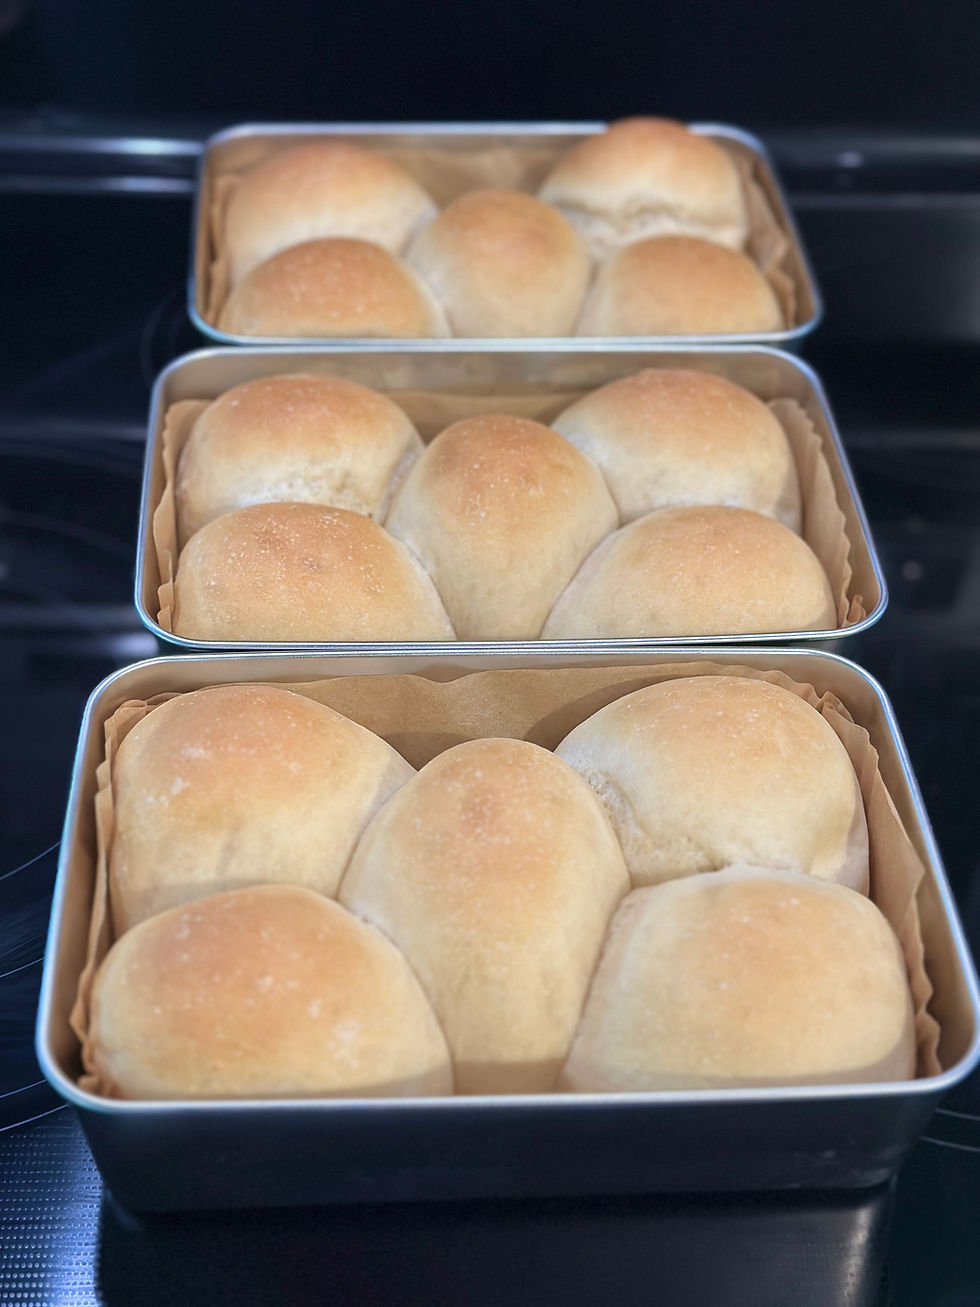
If you have been struggling with rolls that never brown on the bottom, the pan is almost certainly the reason.
Find the pans I use here.
The Silicone Pastry Brush
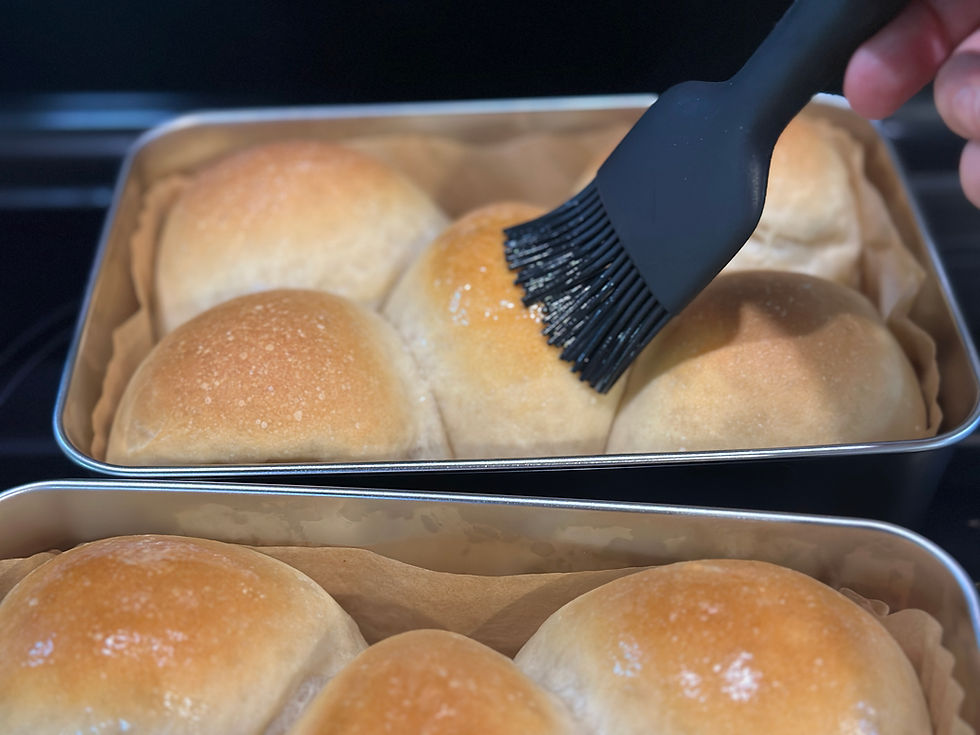
The last step for my Hawaiian Rolls is brushing melted butter across the tops right out of the oven. The silicone brush handles this in a few strokes, applies butter evenly and cleans up in seconds. Silicone bristles do not hold onto food the way natural bristles do. You wash it, rinse it and put it away.
The silicone bristles on this brush will not shed into your food, fall out over time, or hold onto odors the way natural bristle brushes do. It washes clean in seconds and it lasts. That is why I choose Staub for tools that touch my food. Find it here.
The Wire Cooling Rack

Once the rolls come out of the oven and get their butter, they need to cool on something that lets air circulate underneath. A wire cooling rack does exactly that. Setting hot rolls on a solid surface traps steam under the bottom and softens what you just worked to get right. The rack keeps them elevated so air moves all the way around and the texture stays consistent top to bottom.
It is also one of the most used tools in my kitchen outside of sourdough. Sheet pan cookies, cakes, anything that needs to cool evenly. Find the one I use here.
The Best Sourdough Baking Tools Are the Ones You Use Every Single Bake

Every tool in this post has earned its place because it solves a real problem. The scale eliminates guessing. The mixer handles doughs that are hard to knead by hand. The mat gives you a clean surface you trust. The thinner pans give you an even bake. The parchment gives you an easy release and a cleaner bottom. The scraper divides dough cleanly. The oil dispenser keeps your bowl non-stick and your oil fresh. The brush finishes the job and the cooling rack makes sure all that work holds up through the last step.
These are not the fanciest versions of these tools. They are the versions that work consistently, clean up easily and make baking more enjoyable. That is the whole point.
If you want to see everything I use in one place, you can find it all on my Amazon storefront.

Comments